creating beautiful imprints with Baby Art : Review
Over the last couple of months the mom guilt has come cover me. This started around the same time I started to plan my return to work .
I have been thinking about all the things we have done with my maternity leave this time around. We have had so many more days out and made so many more memories . I have made a bigger effort this time to go to play groups with the kids . Having two kids is hard and play group is savour . This time around I have made some great friends at play group . I even see them out of play group , we have a group chat and even meet without kids . This is something I didn’t have when I was off on maternity leave with Ava.
My mom guilt hasn’t been towards not doing things with the kids . Just the things I have kept or made with them. With Ava I made such an effort to make a memory box . So if we did things I would keep a brochure from there or the tickets . I haven’t done this at all since Alby arrived . Even though we have the pictures to remember these days from . I haven’t printed any off like I did with Ava . Looking through Ava’s memory box is lovely as it’s full to the brim of thing . Some of the things I love the most are the imprint items we did . I did them every 6 months up until she was 2 . To look back at how tiny her hands and feet were is just adorable . Ava loves to look through her box and talk about all the things in it .
So this is why I feel guilty as Alby’s box is virtually empty . I haven’t done any imprints or kept things . Then a month or so ago the people over at Baby Art contacted me to see if I would like to try some of their new products . This came at such a perfect time and I could now relax a little and push the mom guilt to the back of my mind for a little bit.
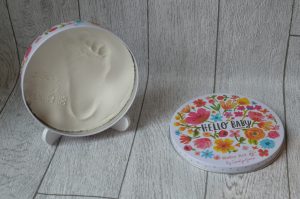
They asked me to take a look at their website and pick two products I would like to try . The first product I was drawn to was the Baby Art Carolyn Gavin limited edition flowers magic box . Mainly because we had the same kind of thing for Ava when she was little and I thought it would be nice for them both to have the same keepsake.

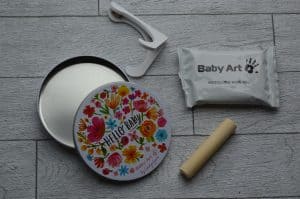
What’s in the box
- The beautiful flower tin
- 1 pack of clay
- Rolling pin
- Stand
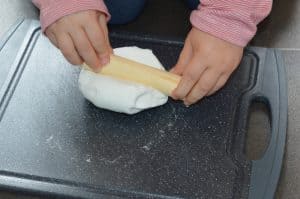
First of all you will need to knead the clay to make it warm. Then place it on a flat surface and using the mini rolling-pin provided to roll it out to the size you require.
We used the tin to gauge how big we needed it . Using this made sure I didn’t roll it too thinly as I knew the size I was after .
I then placed the tin on top of the rolled out clay and pushed it into it. I then moved the tin slightly side to side so it cut into the clay . This then made the clay to the size I was wanting it .
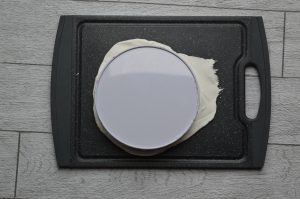
As I rolled my clay onto a clean chopping board I was able to hold the tin to the chopping board and turn it over . Which made the clay I wanted fall into the bottom of the tin . Leaving the excess on the board.
Once in the tin I then got Alby’s foot and made an imprint in the clay . This was fairly easy to do . I find it best to put a small amount of pressure where the toes start this then makes their toes spread out and gives you the best imprint.
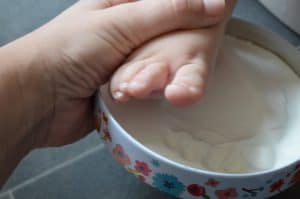
If your not happy with your imprint . You can try again just take it out and roll it again.
I then used a clicker pen without the end clicked out so no ink would transfer to write Alby’s name Into the clay . I also put the date we did it so I could look back and know how old he was when we did it . As Alby is nearly 9 months old we were only able to get one foot imprinted. If you have younger children you will be able to get both feet or a hand and a foot in the clay.
I then left this to dry . It takes at least 24 hours for the clay to dry fully . To ensure no cracks form I made Sure I put it In an area of our house that wasn’t too hot or too cold.
Once this is all dry you can put the thin on the stand and display it in your home for other to enjoy . Ava still has hers in her room and looks looking at it. The great thing about having it in a tin is . If you do want to store it away the tin will keep your imprint nice and safe.
The second product I chose was the Baby Art My little bird suspended frame . If you’re a regular reader then you will know that we’re hopeful moving house soon. So I’m on the look out for bits of artwork to display in our new house . This I thought would look lovely in our new house . You can easily change the photo section to keep it updated but still have the cute imprint in the top section.
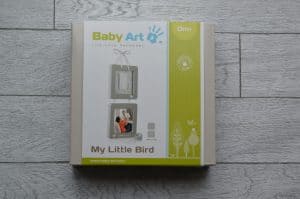
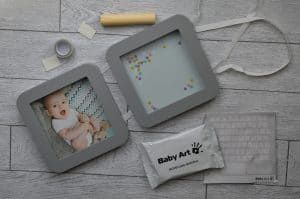
What’s in the box
- Suspended frames complete with a ribbon to tie for hanging,
- Clay,
- Mini rolling-pin,
- Alphabet stickers so you can put a name on the frame,
- Sticky pads which can be used to keep the imprint in place so it does slip or move in the frame.
- Patterned masking tape
We started again by rolling the clay out onto the clean chopping board. I did read on their website it says to roll the clay onto some aluminium foil or baking paper. I didn’t have any of this in the house but the chopping board did work fine. I just made sure to check that it could be lifted off the board before leaving it to dry.
This time I did Alby’s hand before doing any of the print’s I made sure to wipe his hands over to make sure they are clean. The last thing you want to happen is some dirtiness coming off the hands onto your perfect imprint.
Again to get the best print I put pressure just where his fingers start in the centre of the hand as this makes the fingers move outwards.
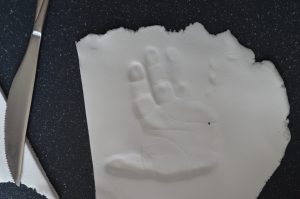
Once I got the imprint I wanted I cut a square around the print using a knife and then left it to dry.
Once the clay was dry I attached it to the hard back in the frame using the sticky pads that came in the set. I then used some of the patterned masking tape to add a little splash of colour and detail to the corners of the back piece. I also used the stickers provided to add Alby’s name to the bottom of the frame. I did also pop a sticker on the back of the frame so I could put the date on it. So in years to come I would know how old he was when we did it.
The frame has a lovely little ribbon that you tie at the top so you can hang it on the wall. I’m waiting to receive some new pictures of Alby so you may notice that the picture of the baby isn’t Alby. It’s the one that comes with the frame. Just before anyone wonders who the baby is.

I really enjoyed doing these with Alby. Ava loved helping me do it too and it was nice to do something together. It’s so easy to do and doesn’t take long at all. You don’t need to be crafty minded to do this honestly anyone can use Baby Arts products.
I’m so glad I now have these lovely imprints to keep forever. To remind me of how small he was.

*We were sent the Baby Art products shown above for free in return for an honest review. All opinions are my own*