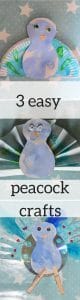
3 easy craft peacock designs to do with children of all ages
As you probably have noticed by now I’m a Bostik blogger thanks to Tots 100. Last month we did some Easter creations . This months theme is flight be it birds or planes. Well Ava has become very interested in animals trying to copying all the different animal sounds. So I thought that birds would be the way to go. Especially as the other week we saw a peacock on the Telly and she was amazed by it. So using this new-found interest in animals and the fascination for peacocks .I thought it would be fun to create some peacocks. They are really easy to do and can be done with children of all ages.

CD peacock
Cd’s seem to be a thing of the past and I have lots of them hanging around the house. That are either scratched and can no longer be used. Or just have stuff on them I no longer listen to. So instead of throwing them in the bin I thought it would be great to include them into this craft. You can if you wish make this peacock without a CD.
You will need
- card
- paint
- feathers
- googly eyes
- pegs
- stick on jewels to decorate
Firstly you will need to cut the body out of card. For younger children you may need to do this for them. Older children may just need a template to cut around. Once you have the body of your peacock you will need to paint it blue.

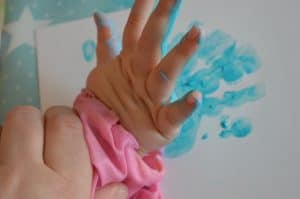
Whilst this is drying you will need a turquoise colour paint. I did this by mixing blue and green together as I was unable to buy this colour pre made. You will then need to paint your child’s hand and do some hand prints. This will form the featured tail second of your peacock. The amount of hand prints you will need will depend on the size of your child’s hand.
Once these parts are dry you are ready to put it all together to create your peacock. I attached the hand prints to the front of the CD first with the coloured side of the hand prints facing forward. Then attach the featured in between each hand print. I used some Bostic glu dots to attach them to the CD.

You then need to attach the body to the CD I again did this by using some glu dots.
Now to add the details I put some googly eyes on and a beak. We then added some coloured gems on the hand prints to add some colour and also some dots of paint on the CD. Then attach some pegs to the bottom of the CD to look like feet and your done.

Paper plate peacock
You will need
- A paper plate,
- white card,
- paint,
- Glitter glue,
- PVA glue,
If you have made the peacock above then you will be using the same colours and the body template.
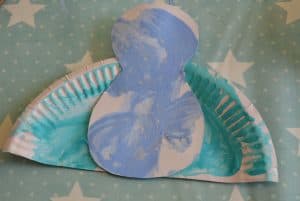
Again you will need to start by painting the body of the peacock-blue. Once this is done you will need to cut the paper plate in half to become the peacock’s tail. Then paint it a turquoise.

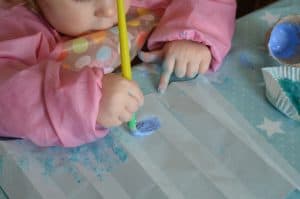
Once dry I then add some detailing to the paper plate using some glitter glue.
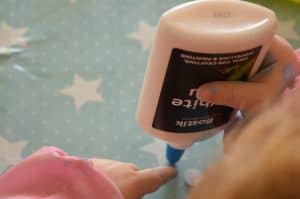
You will now need to attach the body to the tail section. I did this by using some PVA glue to stick them together.
Now for the eyes and beak to make your peacock come to life.

Lastly we have the fan tail peacock
You will need
- white card
- 1 piece of A4 paper this can be white or blue/turquoise
- paint
- PVA glue
We started off again by painting the peacocks body. We then moved onto the tail section. Let your child go to town painting on the A4 piece of paper in peacock related colours. Once this is done and dry you will need to fold it into a fan.
Then take the top fold at both ends and make them meet in the middle. These will then need to be secured together. I used PVA glue for this, dependant upon the type of paper you use you may need to use glu dots.

You will then need to attach the body of your peacock to the fan tail . I did this using glu dots it can be a little difficult so you may need to assist your child doing this.
Again you will now need to add the facial features. This time I didn’t have any googly eyes yet so I cut two small circles out of card and made them into eyes.

There you have it three easy and fun peacock crafts. I hope you have fun creating them . Please do let me know how you get on . I love to see pictures of your creations.
*We were sent a box of craft materials from craft merrily as part of being a Tots 100 Bostik blogger*
One Comment
Pingback: